
Table of Contents
Here is a short video explaining the process, scroll down for detailed ingredients and step by step recipe method. Thanks for coming and do not forget to check other recipes on our homepage.
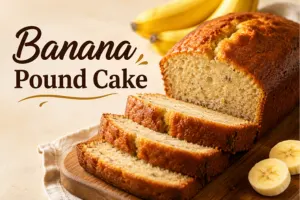
There is something about a banana pound cake that just feels like home. It’s the kind of recipe that has been passed down through generations in Southern kitchens, made on quiet Sunday afternoons and holiday eves when you just get a taste — that deep craving for something rich, comforting, and made completely from scratch. This is not a light, airy banana bread situation. This is a dense, buttery, deeply flavored pound cake with real ripe bananas folded into every slice, finished with a simple vanilla glaze that drips down the sides in the most satisfying way. If you’ve been looking for a banana cake recipe that actually delivers on that old-fashioned homemade feeling, this is the one.
Ingredients with Exact Amounts
The Dry Ingredients
Getting your dry ingredients right is the foundation of any good pound cake, and this recipe keeps it simple and classic. You’ll need 3 cups of all-purpose flour, though cake flour is a perfectly fine substitute if that’s what you have on hand — it will give you a slightly softer, more delicate crumb. Along with the flour, you need 1/2 teaspoon of salt to balance out all that sweetness and butter, and 1/4 teaspoon of baking soda to give the cake just a little lift without turning it into something cakey and light. That small amount of baking soda is all this cake needs — pound cake is meant to be dense and that’s exactly what makes it so good.
The Wet Ingredients
The wet ingredients are where all the magic and flavor lives in this recipe. You’ll need 1 cup of very soft unsalted butter — and when I say soft, I mean genuinely soft, not just slightly cool, or it won’t cream properly. You’ll also need 3 ripe bananas, ideally ones that have gone past yellow and into that brown, spotty stage where they smell intensely of banana and are very soft to the touch. Add to that 1 and 1/2 teaspoons of pure vanilla extract, 1 full cup of sour cream, and 6 large eggs at room temperature. The sour cream is a key player here — it adds moisture, a slight tang, and keeps the crumb tender even though the cake is dense. Don’t skip it or substitute it with something lighter.
The Sugar and Icing
For sweetness, you’ll need sugar to cream with the butter — the recipe uses a generous amount to give you that classic pound cake sweetness and structure. For the simple glaze on top, you’ll need 1 cup of powdered sugar, 1/4 teaspoon of vanilla extract, and 1.5 to 2 tablespoons of milk, adjusted until the icing reaches a thick but pourable consistency. The icing is simple on purpose — the banana flavor is the star and you don’t want anything too sweet or heavy covering it up.
Step by Step Recipe Method
Step 1: Whisk Together Your Dry Ingredients
Start by measuring out your 3 cups of all-purpose flour, 1/2 teaspoon of salt, and 1/4 teaspoon of baking soda into a bowl. Whisk everything together thoroughly until all three ingredients are completely and evenly combined. This matters more than it might seem — if the baking soda isn’t evenly distributed through the flour, you might get an uneven rise or small pockets of bitterness in the finished cake. Once whisked well, set this bowl aside and move on to the wet ingredients. Having your dry ingredients already mixed and ready makes the whole process much smoother when you get to the folding stage later.
Step 2: Cream the Butter Until Pale
Add your 1 cup of very soft butter to a large mixing bowl and begin beating it on medium to medium-high speed. This step is absolutely critical to getting a good pound cake and it genuinely cannot be rushed. You need to cream that butter until it turns pale in color — a noticeably lighter, almost ivory shade compared to when you started. This takes around 45 minutes of beating, sometimes a little longer depending on your mixer and how soft the butter was to begin with. What you’re doing during this process is beating tiny air pockets into the butter that help the cake rise and give it that characteristic pound cake texture. If you under-cream the butter, the cake will be too dense and heavy even by pound cake standards.
Step 3: Mash and Add the Bananas
While your butter is creaming, peel and mash your 3 ripe bananas in a separate bowl until they’re as smooth as you can get them. The riper your bananas, the sweeter and more intensely flavored they’ll be, and the easier they’ll be to mash down. Once your butter is pale and creamy, add the mashed bananas directly into the butter and mix to combine. The mixture will look a little strange and slightly broken at this stage — don’t panic, that’s completely normal and it will all come together once the sugar and other ingredients go in. You’ll notice the whole bowl immediately starts to smell incredible, like warm banana pudding, which is a very good sign.
Step 4: Add the Sugar and Cream Again
Add your sugar to the butter and banana mixture and continue to beat everything together until it’s well combined and fluffy. Take a moment here to scrape down the sides and bottom of the bowl with a spatula — there will always be less-mixed butter or banana hiding down there that won’t incorporate on its own. Getting into the habit of scraping the bowl at every stage means a more even, consistent batter throughout. Once the sugar is fully incorporated and the mixture looks smooth and well-blended, you’re ready for the next additions.
Step 5: Add the Vanilla and Sour Cream
Add your 1 and 1/2 teaspoons of vanilla extract and your full cup of sour cream to the bowl and mix everything together until smooth and combined. The sour cream is what gives this cake its incredible moist, tender crumb despite being a dense pound cake — it adds fat and moisture in a way that keeps every slice from feeling dry or heavy on the palate. Make sure the sour cream is fully incorporated and there are no white streaks remaining in the batter before you move on. Give the bowl another scrape down to make sure everything is evenly mixed.
Step 6: Add the Eggs Two at a Time
Add your 6 room-temperature eggs two at a time, mixing well between each addition. Room temperature eggs are important here — cold eggs can cause the butter mixture to seize up and look curdled, which is not what you want at this stage. Adding them two at a time rather than all at once lets each addition incorporate smoothly before the next one goes in, keeping the batter emulsified and cohesive. By the time all six eggs are in, the batter should look rich, smooth, and glossy. Add the last two eggs, give everything a final good mix, and scrape the bowl down one more time before the flour goes in.
Step 7: Fold in the Flour in Three Additions
Now it’s time to add your flour mixture, and the key word here is fold, not beat. Add the flour in three roughly equal portions, folding gently with a spatula or mixing on the lowest speed after each addition just until the flour disappears into the batter. Folding in stages rather than dumping it all in at once prevents the batter from being overworked, which is what makes pound cakes tough and rubbery. After the first third, fold until just combined, then add the second third and repeat, finishing with the final portion and folding until you have a smooth, thick batter with no visible streaks of flour. Stop as soon as it’s combined — don’t keep mixing beyond that point.
Step 8: Prepare Your Pan and Add the Batter
Preheat your oven to 325°F before you start scooping the batter. For this recipe, a tube pan is the traditional choice and works beautifully — the center tube allows heat to reach the middle of the cake evenly, which is important given how thick and dense the batter is. Spray the pan thoroughly with cooking spray, making sure you get into every corner, side, and the center tube. Alternatively, you can grease the pan with shortening and then dust it with flour, tapping out the excess. Pour your batter into the prepared pan and use the back of a spoon to smooth the top as level and neat as possible. Once it’s smooth, pick up the pan, give it a firm shake, drop it down onto the counter a couple of times, and tap the sides — this knocks out any large air bubbles trapped in the batter and helps the cake bake up level and even.
Step 9: Bake and Test for Doneness
Bake your banana pound cake at 325°F for 1 hour and 15 minutes to 1 hour and 20 minutes. Every oven behaves a little differently, so start checking at the 1 hour and 15 minute mark by inserting a toothpick into the thickest part of the cake. If it comes out completely clean or with just the tiniest crumb clinging to it, your cake is done. If it comes out with wet, raw-looking batter on it, close the oven and give it another 5 minutes before testing again. Don’t open the oven door repeatedly during baking as that can cause the cake to sink in the middle. Once done, remove it from the oven and allow it to cool in the pan for a good while before you even think about adding the icing — icing a warm cake means everything just slides right off.
Step 10: Make the Vanilla Glaze and Ice the Cake
Once your cake has cooled completely, make the simple glaze. In a bowl, combine 1 cup of powdered sugar with 1/4 teaspoon of vanilla extract, then add your milk one tablespoon at a time, stirring after each addition, until you reach a thick, drizzleable consistency. You want it thick enough that it moves slowly, not so thin that it runs off the cake immediately and pools on the plate. Once you’re happy with the consistency, spoon it over the top of the cooled cake and use the back of the spoon to coax it gently over the edges so it drips down the sides in thick, beautiful ribbons. You don’t need to cover every inch of the cake — a natural, rustic drizzle looks far more inviting than a heavy, uniform coating.
Variations in the Recipe
Add Warm Spices to the Batter
If you want to give this cake a warmer, more complex flavor that goes beautifully with the banana, try adding 1 teaspoon of ground cinnamon and a pinch of nutmeg to your dry ingredients before you whisk them together. These spices are classic companions to banana in baked goods and they add a depth that makes the cake taste almost like banana bread and pound cake rolled into one. A small pinch of ground cardamom works wonderfully too if you enjoy that slightly floral, aromatic quality it brings. None of these additions will change the texture of the cake — just the flavor profile, which becomes noticeably richer and more layered.
Fold in Chopped Nuts or Chocolate Chips
If you want a little texture and something extra throughout every slice, fold in 1/2 to 1 cup of chopped walnuts or pecans along with the last addition of flour. Walnuts in particular are a classic partner to banana, and their slight bitterness balances the sweetness of the cake beautifully. Alternatively, semi-sweet chocolate chips stirred through the batter give you pockets of melted chocolate in every slice that pair incredibly well with the banana and vanilla. You could even do both — a handful of nuts and a handful of chocolate chips — for a cake that has everything going on at once.
Try a Cream Cheese Glaze Instead
The simple vanilla milk glaze in this recipe is delicious and unfussy, but if you want something a little more indulgent, a cream cheese glaze takes it to a completely different level. Beat together 2 ounces of softened cream cheese with 1 cup of powdered sugar, a splash of vanilla, and enough milk to bring it to a drizzleable consistency. It’s thicker, tangier, and richer than the plain glaze, and it complements the banana flavor in the cake in a really wonderful way. Pour it over the cooled cake the same way you would the regular glaze and let it set for a few minutes before slicing.
Mistakes to Avoid
Not Creaming the Butter Long Enough
This is the single biggest mistake you can make with this recipe, and it’s a very easy one to make if you’re in a hurry. Pound cake relies almost entirely on the creaming of butter and sugar for its structure and texture because there is very little leavening at work. If you stop creaming after just 5 or 10 minutes because the butter looks mixed enough, the cake will bake up too dense, too flat, and without that lovely tight crumb you’re going for. Forty-five minutes sounds like a long time, but it is not an exaggeration. Set a timer, walk away, and let the mixer do the work. Your patience will absolutely show in the finished cake.
Using Cold Eggs or Cold Butter
Both of these things will cause you problems, though in slightly different ways. Cold butter simply will not cream properly no matter how long you beat it — it stays too firm to take on the air you need for a good texture, and it can leave lumps throughout the batter. Cold eggs added to a creamed butter mixture can cause it to break and look curdled because the sudden temperature difference causes the fat in the butter to seize. Always take your butter and eggs out of the fridge at least an hour before you start baking, or even two hours if your kitchen runs cool, so that everything is genuinely at room temperature by the time you need it.
Overmixing After Adding the Flour
Once the flour goes into the batter, the way you treat it changes completely. Up until that point, you’ve been beating and creaming and mixing aggressively to build structure and incorporate air. But once flour hits the bowl, overmixing develops the gluten in the flour, which makes the final cake tough, rubbery, and unpleasant to eat. Fold the flour in gently and stop the moment you can no longer see streaks of it in the batter. Three additions and a gentle hand is all it takes. If you’re using a stand mixer for this stage, put it on the absolute lowest speed and watch it carefully so you can stop as soon as the flour is just incorporated.
Skipping the Pan Preparation Step
A tube pan can be notoriously difficult to release a cake from if the pan isn’t properly greased, and with a cake this dense and heavy, a stuck cake is a genuinely heartbreaking outcome. Take the time to spray every inch of the pan thoroughly, including the center tube and every corner where the base meets the sides. If you’re using the shortening and flour method, tap the pan firmly to knock out all the excess flour before adding the batter. A well-prepared pan means the cake slides out cleanly after cooling, looking exactly as beautiful as it should. Cutting corners on this step is never worth the risk.
Conclusion
Banana pound cake is the kind of recipe that earns a permanent spot in your baking repertoire from the very first time you make it. It’s old-fashioned in the best possible way — no complicated techniques, no unusual ingredients, just good butter, ripe bananas, sour cream, and the patience to do each step properly. The result is a cake that is dense without being heavy, sweet without being cloying, and packed with real banana flavor in every single bite. Drizzled with that simple vanilla glaze and served at room temperature, it’s the kind of thing people ask you for the recipe after just one slice. Make it once and you’ll understand exactly why this style of cake has stayed in Southern kitchens for generations.
FAQs
How ripe do the bananas need to be? The riper the better, as a general rule. You want bananas that have gone well past yellow and into a brown, spotty stage where the skin has darkened significantly and the fruit inside is very soft and intensely sweet. At that level of ripeness, the natural sugars in the banana have developed fully, which means more banana flavor and more sweetness in the finished cake. That said, if your bananas are very black and look rotten or smell fermented, it’s best to toss those — brown and spotty is the sweet spot.
Can I use a bundt pan instead of a tube pan? Yes, a bundt pan works perfectly well for this recipe and will give you a beautiful decorative cake with the same great texture. The important thing is that the pan has a hollow center — either a tube or a bundt design — because this helps the heat reach the center of such a dense, thick batter. A regular round or loaf pan without a center will leave you with an undercooked middle even when the outside looks done. If using a bundt pan, the baking time will be roughly the same, but start checking a few minutes early.
Can I make this cake ahead of time? Absolutely, and in fact this cake gets better on the second day once the flavors have had time to settle and the crumb has fully set. Bake it, let it cool completely, add the glaze, and store it at room temperature covered with plastic wrap or in an airtight container. It will stay moist and delicious for up to 3 days at room temperature. For longer storage, wrap individual slices tightly and freeze them — they thaw beautifully at room temperature in about an hour and taste just as good as fresh.
What can I use instead of sour cream? Full-fat Greek yogurt is the closest substitute and works extremely well — use it in the same quantity (1 full cup) and you’ll barely notice the difference in the finished cake. Plain full-fat yogurt (not Greek) also works but has a slightly thinner consistency, so drain it first if you can. Buttermilk is another option, though it’s thinner than sour cream so it will change the batter consistency slightly. Whatever you substitute, avoid using low-fat versions of anything — the fat is what keeps this cake moist and tender.
Why does my pound cake sink in the middle? A sunken middle is almost always caused by one of three things: opening the oven door too early during baking and letting cold air in, underbaking the cake so the center hasn’t set before it’s removed from the oven, or adding too much leavening. This recipe uses only 1/4 teaspoon of baking soda, which is intentionally very modest — don’t be tempted to add more thinking it will make the cake rise better. Always do the toothpick test before removing the cake from the oven, and resist opening the oven door before the 1 hour and 15 minute mark at the earliest.